GIMP is a free, open-source photo editing program that delivers professional-grade tools for retouching, color correction, and creative compositing without the subscription fees of commercial alternatives. The current stable release, version 3.2.4 (released April 2026), works across Windows, macOS, and Linux, making it accessible to photographers on virtually any platform. Whether you’re a beginner looking to learn photo editing fundamentals or a seasoned professional seeking a capable tool for RAW processing and layer-based workflows, GIMP offers the core capabilities you’d expect from industry-standard software.
That said, GIMP differs fundamentally from programs designed exclusively for photographers. Its interface follows graphic design conventions rather than photo-centric layouts, which means you’ll encounter a steeper learning curve if you’re used to catalog-based systems. The software excels at detailed retouching, precise selections, and complex compositing through layers and masks. It handles color management, supports non-destructive editing through adjustment layers, and works with common RAW formats when paired with plugins.
The real question isn’t whether GIMP can edit photos (it absolutely can) but whether its approach fits your workflow and skill level. This guide walks through what GIMP does well for photography, where it requires workarounds, and how to decide if its zero-dollar price tag justifies the time investment in learning its distinct interface.
What GIMP Offers Photographers
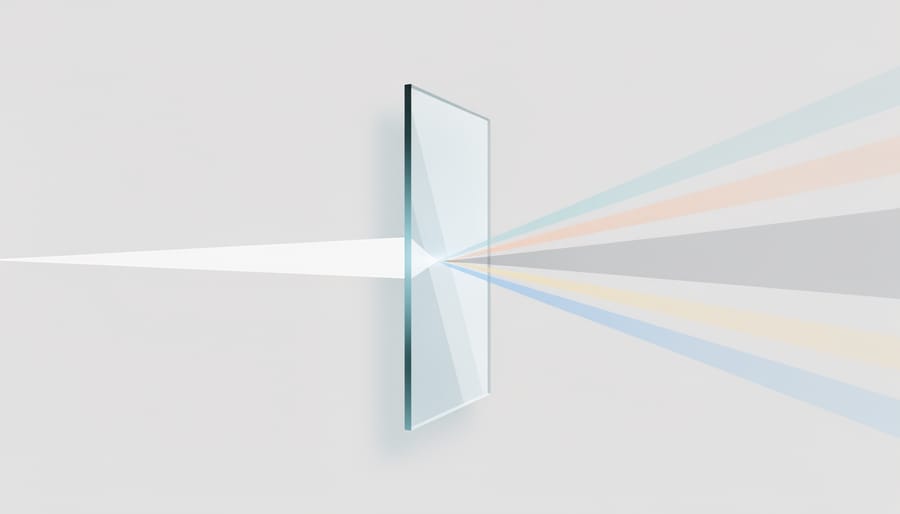
GIMP equips photographers with a comprehensive toolkit that mirrors what you’d find in professional-grade software, minus the price tag. At its foundation lies layer-based editing, the same non-destructive workflow professionals rely on. You can stack adjustments, blend multiple exposures, and maintain complete control over every element in your composition without permanently altering your original image.
The color correction capabilities cover the essentials photography demands. Curves and levels give you precise tonal control, while the color balance and hue-saturation tools handle white balance adjustments and creative color grading. GIMP processes images in 32-bit floating-point precision per channel when needed, preserving detail in highlights and shadows during intensive edits.
Retouching tools address common photography needs. The clone stamp removes unwanted elements, the healing brush blends seamlessly for skin work, and the perspective correction tool straightens architectural shots. You’ll find dodge and burn capabilities for selective exposure refinement, plus a sharpen tool and noise reduction filters to polish final images.
GIMP handles RAW files through plugins, letting you import and process camera raw formats alongside standard JPEGs, TIFFs, and PNGs. Batch processing automates repetitive tasks, watermarking a gallery, resizing for web delivery, or applying consistent adjustments across a series. The software supports common interchange formats including PSD, so you can move files between different editing environments when collaborating.
What can you realistically accomplish? Full end-to-end photo editing: import your shoot, cull and organize externally, then bring selected images into GIMP for exposure correction, color work, local adjustments, retouching, and final export. It won’t replace a dedicated RAW processor’s speed or a purpose-built catalog system, but for actual pixel-level editing and creative work, GIMP delivers the tools photographers need.
Getting Started with GIMP
Getting GIMP running on your computer takes minutes, and there’s no credit card or trial period to worry about. Visit the official GIMP website and navigate to the downloads page, where you’ll find installers for GNU/Linux, macOS, and Windows. The current stable release is version 3.2.4, GIMP 3.2.4 released in April 2026, which brings the latest improvements and fixes to all platforms.
Linux users have several download options beyond the direct installer. You can grab the AppImage for x86_64 or ARM64 systems (available as direct downloads or via BitTorrent), or install GIMP through Flathub or the Snap Store for automatic updates. Windows and macOS users will find straightforward installers that guide you through setup like any other application.
After installation, launching GIMP for the first time presents a default workspace that might look unfamiliar if you’re coming from other photo editing software. The interface uses floating dialogs and panels rather than a single-window design (though you can switch to single-window mode through Edit > Preferences). Spend a few minutes customizing your workspace before importing photos. Drag the Layers, Brushes, and Tool Options dialogs to positions that suit your workflow, and GIMP will remember these settings for future sessions.
First-time users should also check Edit > Preferences > Color Management to set up color profiles if you work with calibrated monitors or need accurate color reproduction. This one-time setup ensures GIMP handles your image colors correctly from the start.
The GIMP Interface for Photo Editing
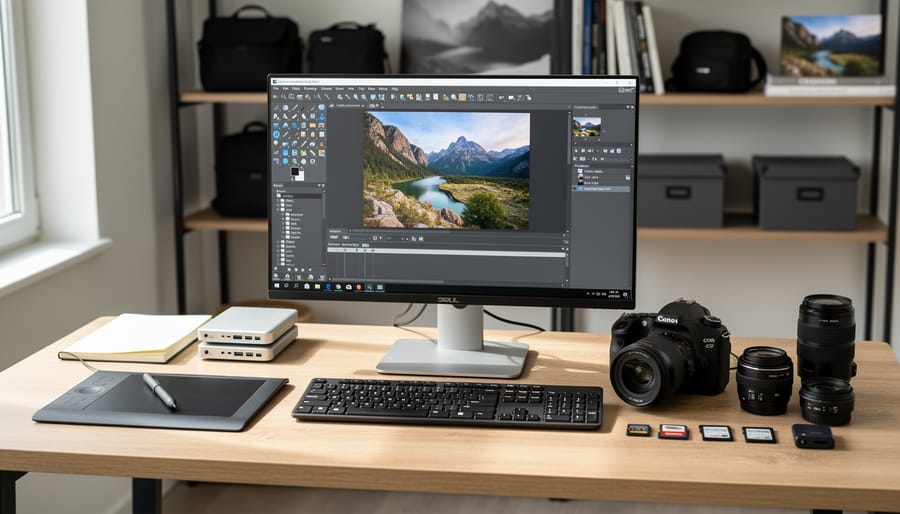
When you first open GIMP, the interface can feel unfamiliar if you’re coming from other photo editing software. The default workspace uses a single-window mode with three main areas: a toolbox on the left, your image canvas in the center, and dockable dialogs on the right. This layout differs from the more streamlined interfaces photographers might know, but it’s designed for flexibility rather than simplicity.
The toolbox holds selection tools, paint tools, transform options, and color pickers. Unlike software that hides tools in nested menus, GIMP displays them upfront. Each tool has options that appear below the toolbox when selected. For photography work, you’ll primarily use the selection tools (rectangle, ellipse, free select), crop, color correction adjustments, and clone/healing tools.
The right panel displays dockable dialogs, Layers, Channels, Paths, Brushes, and more. Photographers typically customize this area to show Layers, Histograms, and Tool Options prominently since these matter most for photo editing. You can drag any dialog to a new position, close ones you don’t need, or add new ones through the Windows menu.
GIMP uses a different layer naming convention and adjustment approach than some competitors. Adjustments aren’t automatically non-destructive layer-based by default; you’ll often work directly on image layers or use the Colors menu for changes. This workflow takes adjustment if you’re accustomed to dedicated adjustment layers, though you can achieve similar results using layer masks and duplicates.
The learning curve exists mainly in adapting to where GIMP places familiar functions rather than learning completely new concepts. Customizing the interface to match your photography workflow, hiding unused dialogs, arranging frequently-used tools, and saving your workspace layout, makes GIMP feel considerably more intuitive after the initial setup.
Essential Photo Editing Workflows in GIMP
Basic Adjustments and Color Correction
GIMP’s core color and tone adjustments live in the Colors menu, where you’ll find everything needed to polish your photos. Start with Exposure (Colors > Exposure) to fix underexposed or overexposed shots. The Levels tool (Colors > Levels) handles contrast by adjusting the histogram’s black, white, and midtone points, drag the left slider to deepen shadows, the right to brighten highlights, and the middle to shift overall brightness. For white balance corrections, use Colors > Color Temperature to shift cooler or warmer, or try Colors > Auto > White Balance for a quick starting point, then fine-tune manually if needed. The Curves tool (Colors > Curves) gives precise control over tonal ranges by drawing a curve across the brightness scale, letting you lift shadows without blowing highlights or create contrast exactly where you want it. For color grading, Hue-Saturation (Colors > Hue-Saturation) adjusts individual color channels, boost or mute specific hues to make photos stand out. Work non-destructively by duplicating your layer (Layer > Duplicate Layer) before making adjustments, so you can always revert or blend changes.
Retouching and Detail Work
GIMP’s retouching tools handle most portrait and product photography cleanup tasks without cost. The Clone tool (keyboard shortcut C) copies pixels from one area to another, useful for removing distractions in product shots or duplicating elements. Press Ctrl while clicking to set your source point, then paint over the target area. The Healing tool works similarly but blends the copied pixels with surrounding tones, making it better for skin retouching where you need seamless repairs.
For detail enhancement, the Sharpen/Blur tool lets you selectively sharpen eyes or product details without affecting the entire image. Work at 100% zoom to see the actual effect. The Smudge tool softens harsh transitions between retouched areas and surrounding skin. When editing portraits, whether studio headshots or environmental portrait tips apply, use a soft brush at low opacity (15-30%) for natural results.
The Dodge and Burn tools lighten or darken specific areas, creating dimension in portraits or emphasizing product features. Keep the exposure setting low and build up gradually rather than making dramatic changes in one pass.
Exporting and File Management
GIMP’s native XCF format preserves all layers, channels, and editing history, always save your working file as XCF before exporting. For final output, use File > Export As and choose the format based on your needs: JPEG for web and sharing (adjust quality slider to 85-95 for photography), PNG for images requiring transparency or lossless compression, and TIFF for print work or archival storage. When exporting JPEGs, avoid setting quality below 80 to prevent visible compression artifacts in photos. For batch exports of multiple images, Extensions > Batch Process offers time-saving automation for resizing or format conversion across entire folders.
How GIMP Compares to Other Photo Editing Options
GIMP’s position in the photo editing software landscape is straightforward: it offers legitimate professional-grade tools at zero cost, but trades polish and photography-specific optimization for that accessibility. Understanding where it excels and where paid alternatives pull ahead helps you decide whether it fits your workflow.
GIMP’s core strength lies in its comprehensive feature set without subscription barriers. You get layer-based editing, advanced selection tools, color correction capabilities, and extensive format support the moment you install version 3.2.4. The software runs equally well on GNU/Linux, macOS, and Windows, making it platform-agnostic in ways some commercial options aren’t. For photographers who need occasional complex retouching, compositing work, or batch processing without recurring costs, GIMP delivers capable tools that handle professional tasks.
Where GIMP shows its age compared to dedicated photography software is in workflow efficiency and specialized features. RAW processing requires plugins rather than native support, and those plugins typically process files more slowly than purpose-built RAW converters. The interface, while customizable, lacks the intuitive touch of software designed specifically around photographic workflows. Features like automatic lens correction, advanced noise reduction algorithms, and non-destructive editing workflows come through plugins or require more manual work than in specialized photography applications.
Paid alternatives often justify their cost through photography-specific optimizations: faster RAW processing, dedicated catalog and organization systems, automatic cloud backup, mobile companion apps, and regular feature updates tied to new camera releases. They also tend to offer more polished user experiences with better onboarding for beginners. If your photography work demands cutting-edge camera support, lightning-fast RAW conversion, or seamless integration across devices, subscription-based or one-time-purchase photography software may prove more efficient despite the financial cost.
The practical question isn’t whether GIMP matches feature-for-feature with commercial options, but whether its capabilities meet your specific needs at its unbeatable price point. Many photographers use GIMP alongside other tools, handling certain tasks in GIMP while using specialized software for RAW conversion or cataloging.
Who Should Consider GIMP
GIMP makes the most sense for photographers who value flexibility and control without ongoing costs. If you’re just starting with photo editing, GIMP lets you learn fundamental techniques, layers, masks, color correction, without paying for software you’re still figuring out how to use. The same goes for hobbyists who shoot occasionally and don’t want subscription fees eating into their gear budget, especially if you’re trying to choose a new camera and need to allocate funds there instead.
Photographers who need advanced editing capabilities occasionally rather than daily will find GIMP covers most situations without requiring paid alternatives. It handles complex retouching, compositing, and detailed color work when needed, even if your primary workflow happens elsewhere. Educators and students benefit from GIMP’s zero cost and cross-platform availability, entire classrooms can use identical software without licensing headaches, and students can continue working on their own computers without piracy or temporary trials.
Linux users get a particular advantage since GIMP runs natively and integrates smoothly into their existing workflow, unlike many commercial photography tools that require compatibility layers or don’t run at all.
That said, photographers who shoot high volumes of RAW files daily, need the fastest possible processing speed, or rely heavily on automated AI features may find dedicated commercial options better suited to their specific workflow demands. GIMP excels when your priorities are capability, cost savings, and learning depth over specialized photography automation.
Common Questions About GIMP for Photography
Is GIMP difficult for beginners to learn?
GIMP has a steeper initial learning curve than some consumer photo editors, particularly if you’re accustomed to other interfaces. However, the fundamentals of layer-based editing remain consistent across software, and most photographers become comfortable with basic tasks within a few editing sessions.
Can I extend GIMP with plugins for photography?
Yes, GIMP supports plugins and scripts that add specialized functionality. The community has developed numerous extensions for photography tasks, though the plugin ecosystem is smaller than what paid alternatives offer.
Where can I find tutorials for photo editing in GIMP?
Extensive community resources exist, including video tutorials on YouTube, written guides on photography blogs, and active forums where users share techniques. The official GIMP documentation also provides detailed explanations of every tool and feature.
Does GIMP handle large RAW files well?
GIMP can work with RAW files through plugins, though processing speed may lag behind dedicated RAW editors when handling batches of high-resolution images. For occasional RAW editing on standard hardware, performance proves adequate for most photographers.
The long-term viability question comes up frequently. GIMP has been actively developed since 1996, making it one of the most established open-source projects in existence. The recent release of version 3.2.4 in April 2026 demonstrates continued active development and modernization. Being free and open-source means it won’t disappear behind discontinued subscriptions or corporate decisions.
Community support remains robust. Thousands of photographers and designers use GIMP daily, contributing to forums, creating tutorials, and developing plugins. This grassroots ecosystem means you’ll find solutions to most problems through quick searches, though responses may take longer than commercial support channels.
Performance with large files depends on your hardware. GIMP can edit high-resolution images, but operations on 50-megapixel files with multiple layers will tax older computers. The software runs a single editing instance, so batch processing happens sequentially rather than in parallel, which matters if you routinely process hundreds of images at once.
GIMP stands out as a genuinely capable photo editing solution that happens to cost nothing. For beginners learning the fundamentals, hobbyist photographers avoiding subscription fees, students building their skills, or anyone curious about advanced editing without financial commitment, it delivers real value. The software won’t suit every photographer, those requiring specialized RAW processing speed or a camera-specific workflow might need dedicated tools, but GIMP’s combination of professional-grade features and zero cost makes it worth trying for yourself. Download version 3.2.4 today, open one of your own images, and spend an hour exploring what it can do. You’ll quickly discover whether GIMP fits your photography workflow.